CONVERTING THE CX5M/II 128 TO MSX2 (XB300 board version)
MSX2 is an upgraded standard of MSX1. The main improvements on MSX2 are graphic capabilities. The Video Display Processor (VDP) has been changed to the Yamaha V9938 which provides higher resolution, more colors and and adjustable color palette.
The CX5M/II already has the V9938 built in but it only has 16K Video RAM which is not enough to fully use the capabilities of this chip. The CX5M/II has a MSX1 BIOS in ROM so the functions cannot be addressed through BIOS or BASIC. There is an extra ROM extension present which provides 80colums text resolution support but that is about it.
My CX5M/II is an USA model with just RF and CVBS output (CX5M/C video board). The higher resolutions of the V9938 would be difficult to read with this output. On the video circuit board there is some empty space which would provide the RGB output on the european models so I also decided to rebuilt this. Only difficult part was locating a 2SC1684 Transistor but looking at the characteristics of this transistor I just put in a BC547 and there’s no problem (but remember the E and C connector pins are swapped so the PCB indicates a wrong install direction). I believe this transistor has something to do with the sync signal and I took his from the CVBS signal anyway.
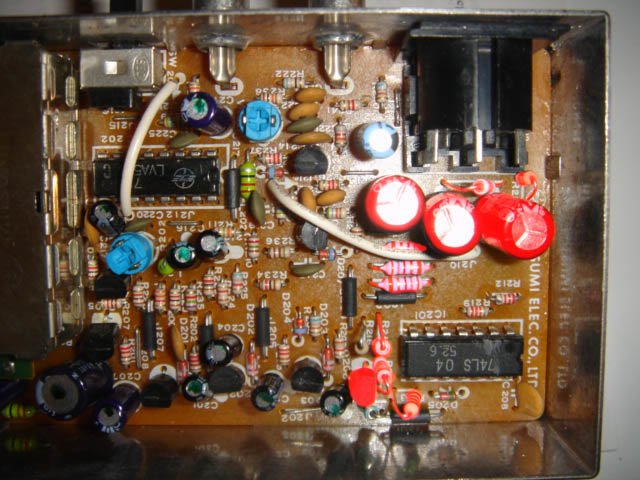
Red marked parts are the ones I soldered in. This is the parts list:
Capacitors:
3x 300uF (C227, C228 and C229)
Resistors:
1x 22K ohm (R213)
1x 10K ohm (R214)
1x 15K ohm (R215)
1x 220 ohm (R216)
1x 68 ohm (R217)
1x 1K ohm (R220)
1x 120 ohm (R221)
3x 18 ohm (R243, R244, R245)
Transistor:
1x BC547 (T206)
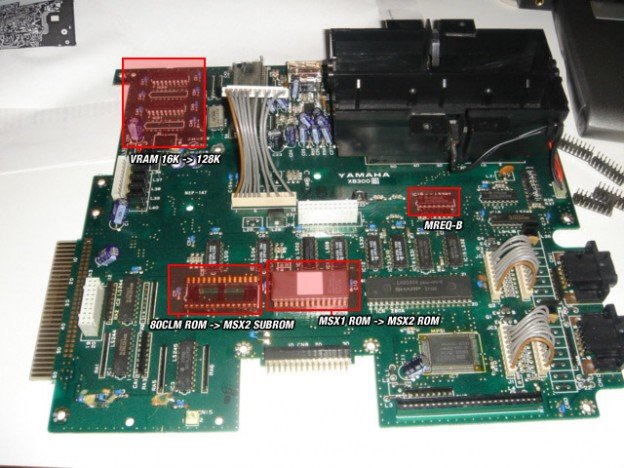
MAIN HARDWARE
Below there’s a view of the mainboard (memory mapper removed to expose the two ROM IC’s):
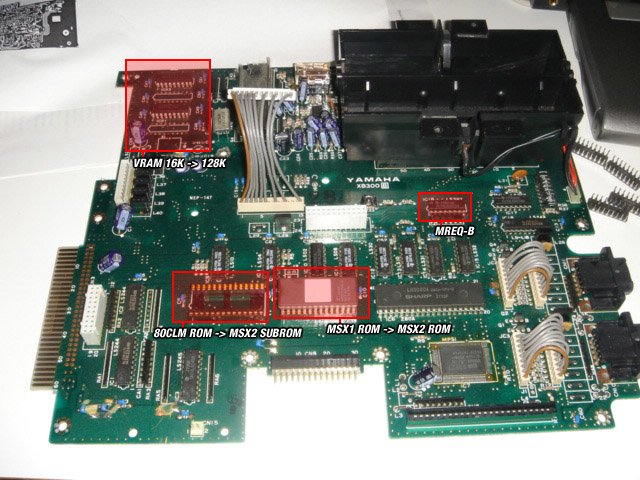
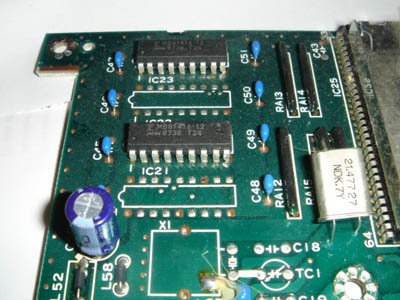
First the VDP Needs more Video RAM (VRAM) They are located on the back left of the mainboard.
 |
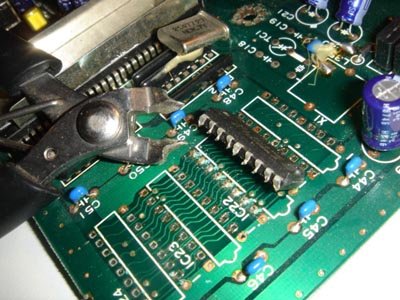 |
| The original 2x8KB IC’s | I cut out these two VRAM IC’s with some pliers I adapted so they fit between the IC legs. This way you can easily pick out the remaining pins one by one. |
 |
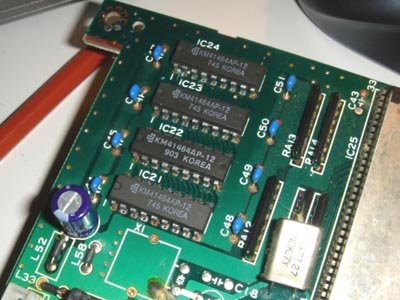 |
| Pinholes cleaned out … | …and in with the new 128KB. |
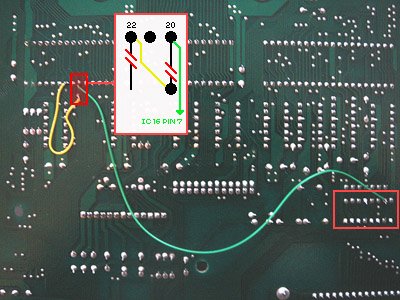
Remains adapting the roms. The MSX2 subrom can be placed in the socket where the 80CLM rom was located. This requires the following adaptation:
– Cut the wire to ROM pin 22
– Cut the wire between the printspot and pin 20
– Connect the printspot from pin 20 to pin 22 (yellow wire)
– Connect a wire from ROM pin 20 to pin 7 of IC16
Only thing that is missing is the clockchip. To boot the CX5M without this chip you would have to use special ROMs I used the ROMs from Louis C. Grosso from Hans Otten’s page and they work fine
Thanks to the guys at msx.org for leading me in the right direction on this.


